
Scope of this lesson
This lesson is limited to what you need to know to use your existing images in a web page. Creating and manipulating the images is beyond the scope of this course.
About images for the web
Pixels
Images are comprised of pixels, just like your monitor screen. Therefore an image a certain number of pixels wide, by a certain number high, will display at a certain size depending upon the resolution of the screen. Forget about other measurements; when it comes to web images it's all about pixels! Any image manipulation program, and many image viewers, will indicate the pixel dimensions (and zoom level) of the image you are viewing.
Resolution and file size
You should use images that have the lowest file size consistent with acceptable image quality. Low resolution is quite ok on the web – it still looks good and helps the page load more quickly. And it's less to upload to and store on your web server. A rogue high-resoluton image that makes its way onto the server can take as much space as dozens or hundreds of low-res images.
If you're going to have images on your website, then you'll need at least a basic working knowledge of image optimisation (minimising the file size of your images).
Image size
Size your images to the exact dimensions you would like them to be on the webpage, pixel for pixel. Apart from any 'hero' images, aim to make the images on each page all the same size and/or proportions.
Types of images
The image types described below are those most suited for use on a website. 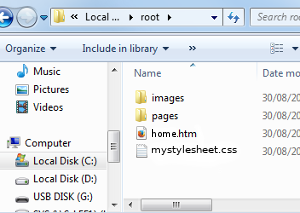 Both PNGs and JPGs can be compressed to a low file size for website use.
- png
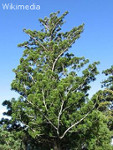
- Best suited for images with a limited range of colours and areas of a single colour, such as logos and other illustrations. It allows for transparency. This file format has largely replaced the 'gif' format, which generally does the same job but not as well. The image to the right is a png – notice how it has large areas of white and few colours compared to a photo.
- There are two versions of png: png8 and png24. The former is limited to 256 colours. The latter has unlimited colours and offers better quality transparency, but with a larger file size.
- jpg (or jpeg)
- For images with many colours and few areas of a single colour, such as photos.
- SVG
- Scalable Vector Graphics is a very different kind of image format. It is beyond the scope of this course, but you should be aware of it and learn about it as your skills develop.
<img> tag
This is the HTML 'image' tag. Note there is no closing tag.
<img>
However, the <img> tag on its own is not enough, as two attributes are 'required'.
src attribute
The first required attribute is the 'src' (source) attribute, which incorporates the file path. This links the HTML document to the image, wherever it is stored.
<img src="file path/name of image">

<img src="../images/directorypic.png">		(example)
alt attribute
The other required attribute is the 'alt' attribute, which is needed for accessibility purposes. Enter a meaningful description of the image. The text you enter will be seen if your image cannot be displayed.
<img src="../images/directorypic.png" alt="screenshot of root directory">
Class/ID
With the 'src' and 'alt' attributes your img tag is technically complete. However, chances are you'll need to give your image a class (or ID), as shown below.
<img class="rightfloat" src="../images/directorypic.png" alt="screenshot of root directory">
Your 'img' tag is now complete. The next step is to specify the CSS.
CSS for images
The CSS selector for images is 'img'. The CSS styling format is the same as for other elements, as shown below.
img {
  property: value;
  property: value;
  property: value;
  }

.imageclass {
  float: right;
  border-width: 2px;
  border-color: black;
  }
Image effects with CSS filters
CSS 'filters' allow you to apply some Photoshop-like effects to your images. For example, the ruleset below applies a sepia tone to all images (you can see the result at bottom right). The value in brackets sets the strength of the filter.
img {
  filter: sepia(100%);
  }
Here are the available filter types. The CSS Tricks site has all you need to know on this topic.
- blur
- brightness
- contrast
- drop-shadow
- grayscale
- hue-rotate
- invert
- opacity
- saturate
- sepia
Here is an example of each filter.
Default CSS for your images
Your CSS should include some default settings for your images. You will learn about this in Lesson 25.