Replacing Moulton Series 2 'F' frame plastic cable guides
Functional and less obtrusive
Those of us familiar with the early Moultons know that each model (Series 1, 2 or 3) is a mixed bag of pros and cons that silently tell the short, turbulent story of the most original bike of the twentieth century. The first 'F' frame of 1962 had the formula right, but in execution it wasn't quite 100%. The problems were ironed out progressively, and by the latter part of 1965 the Moulton had evolved into the definitive 'Series 2', fully sorted at last. If your bike is one of these you may well feel chuffed, especially about the strengthened swingarm that replaced the fracture-prone version on the earlier bikes.
But it wasn't all good, as by then some corners had been cut. The trouble is the company found itself in financial strife before the bike could be fully sorted. Sales were falling with the emergence of competition – most notably the Raleigh RSW – and they responded by cheapening the product. This included replacing the tasty alloy parts on the deluxe model with heavier steel equivalents, and replacing the distinctive 'billiard cue' paintjob with a solid colour.
But if you're like me, what annoys you most are the horrible white plastic cable guides that came with the Series 2s. The earlier bikes had fine steel loops brazed to the frame, but that must have been too costly to survive the austerity campaign. A shame, as I think the plastic guides look cheap and nasty, and would have looked so even when the bikes were new (judge for yourself from this advertisment). As you'd expect, the survival rate of the plastic cable guides after 50 years isn't good, and your Series 2 may only have a few useable ones left; how many Series 2s have their cables tamed by zip ties? And where a frame isn't marred by broken cable guides and zip ties, then it's pocked by little holes where long-departed cable guides once lived.
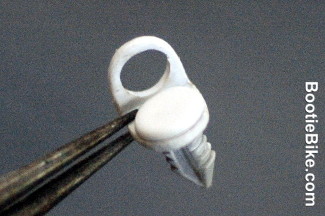
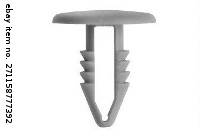
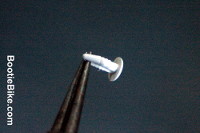
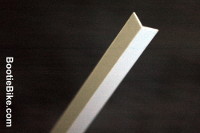
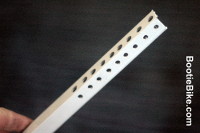
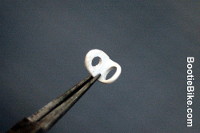
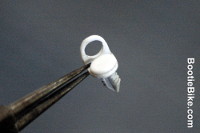
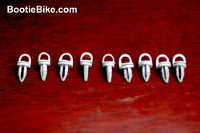
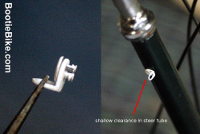
What to do? Exact replacements can't be found, and the search goes on for the neatest, most effective way to replace them. So here's Bootiebike's way: Essentially, I've fabricated some little brackets from a length of right angle plastic trim moulding, obtained from a hardware store. Each bracket is held in place by an automotive trim 'canoe' clip, which fits snugly in a frame hole.
Notes
I've aimed to make the illustrations below tell the whole story, so it shouldn't need much explanation, but a few notes are in order…
- I've painted the new guides to match the frame. If you do this, I suggest you roughen up the surface of the canoe clips with some sandpaper to help the paint stick.
- The canoe clips that go into the head tube must be carefully shortened, as there is little clearance behind the frame holes. The shortened clips are significantly weakened, but they should hold on well enough if you handle them carefully during installation. Don't plug them in before threading the cable through. The best way is to pop the brackets over the cable loose as you install the cable. Once the cable is roughly in place, move each bracket in turn to its hole – then pop in its (shortened) canoe clip. Apply a bit of lubricant to help it go in.
- Make the cable hole a generous size on the brackets either side of the cable bends, and consider chamfering the edges of each hole.
- You may be better off skipping the gear cable guides on the head tube anyway. It's a tortuous cable run (e.g. close to 90° bend) that can play havoc with the finicky FW gear change if set up less than perfectly.
Good luck!

